Planners

Planners
Planners

Scrapbooking

Scrapbooking
Scrapbooking

Party

Party
Party
Powered by Blogger.

How to Create 2 Layouts 1 Way | Side by Side


As a mom, my time is valuable. I use to take several hours to create a scrapbook layout and now have looked that that time differently. I might have a few hours to scrapbook, but whipping out as many pages is now my goal! 


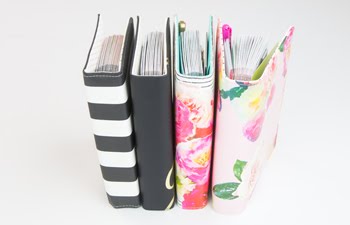
Using Heidi Swapp's Storyline Chapters albums helps save time because the albums come with base pages. These pages are acid free and designed to add photos and a story.


Another time saver is deciding a design for a layout and creating several pages that are similar. Here I have created two layouts with one way - side by side photos.


I usually keep my images 4x6 because it quick to print from home or have printed at my local printer. So, with this design of putting 2 4x6 images side by side keeps me from wasting time overthinking it! 


The first layout is matted with some basic scrapbook paper. Card paper pads can even make this matting job faster! The title runs along the left side for a fun look.


The second layout is quickly put together with stickers. I usually like to type my journaling but when I am creating Storyline layouts I am making sure to remember that it is going to be important for my children to see my handwriting one day. These journaling spots on the bottom of the page help keep my handwriting in a controlled space, Ha!


This is simple yet a great way to get 2 layouts done in under 20 minutes! It gives me such satisfaction to get these pages into the kids' albums. 

You can find Heidi Swapp Storyline albums at JOANN and online. Please note that this is not a sponsored post and all these designs and ideas are my own.

Stay tuned in to for a few more ways I am using Storyline to scrapbook pages in under 20 minutes. 

Foil Quill Stenciling


I love foil. I also love mixed media. However, more than ever, I love finding a quick and easy way to add that foiled look to my project without pulling out a dozen supplies.


This layout came together quickly with adding the Heidi Swapp Stencil to the top of the paper and using the We R Memory Keepers Foil Quill Freestyle Pen to just trace the words on to the paper. This stencil pack is made with thick poster board and designed to use the MINC Texture Paste. Yet, I love that I can get several uses out of it by using it with the Foil Quill first. 


Foil Quill Stenciling on a Scrapbook Layout

Please note this is not a sponsored post and all ideas and opinions are my own.


To get this foiled distressed look on the alphabet chipboard letters, I drew with the Heidi Swapp Glue Pen along the edges and then, when it was tacky, used MINC foil to press gold on those tacky areas. This was so quick and easy that I will be doing it again!


I hope these simple foiling techniques will make you stretch your foiling supplies even farther! 


Introducing Color Pour


I have always been intrigued by the paint pour trend. I have loved the idea and the look, but the thought of mixing a bunch of chemicals together and the mess of mixing paints frightened me. So, when American Crafts asked if I would like to try their new Color Pour collection, now in Jo-Ann Fabric and Craft Stores, - with NO mixing involved, I was excited to say the least!


Heidi Swapp - Hawthorne Scrapbook Page


There is something I love so much about matching my photographs to papers. In my scrapbooking crop days, I would bring my photos to the scrapbook store and I would walk around the paper racks with my photos in hand dragging them across the pages looking for the perfect color match.

Chill Out it is Summer Graduation Party

Chill Out It Is Summer Graduation Party by @createoften for @heidiswapp | Using Wall Words and Letterboard

If your kids are anything like mine, they are counting down the days before summer! That deserves a celebration alone, but this year we are also celebrating a graduation!